
Posted by Marty Sanchez on Nov 11th 2020
Valentine Candy Box & Candies
Materials List:
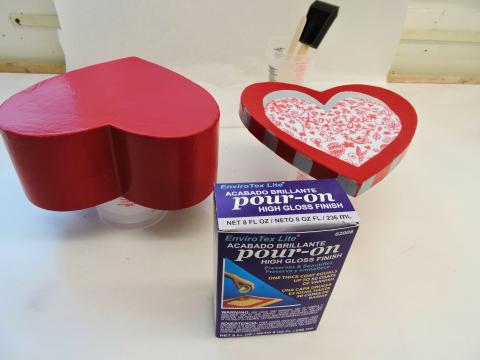
- EnviroTex Lite, 16 ounce kit
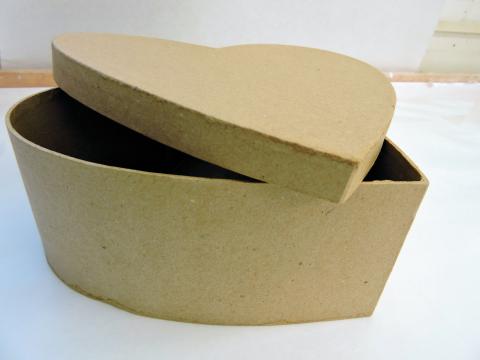
- 6.5” x 7” x 3” Heart Shaped Paper Mache Box
- Choice of Acrylic Craft Paint
- Decorative Paper, 2 coordinating colors / designs
- Ultra-Seal Multi-Purpose Sealer & Glue (or any white craft glue that dries clear)
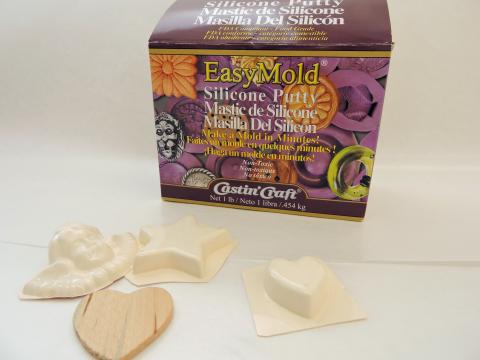
- EasyMold Silicone Putty, 1 pound kit
- Trinkets or Shapes (for making Candy Molds)
- 1-2 Pounds of Chocolate (such as Wilton Candy Melts).
- Paper Baking Cups or Candy Cups
Tools & Basic Supplies
Disposable foam brush, paint brushes, measure / mixing cups, stir sticks, 220 grit sandpaper, marker, clear tape, wax or newspaper, scissors, cookie sheet, glass bowl or double boiler
Project Instructions:
Decorate Heart Box
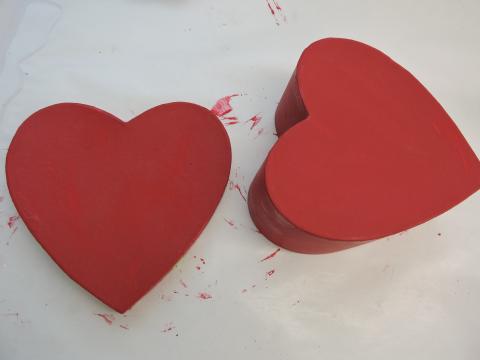
Step 1: Protect your workspace with newspaper or wax paper.
Step 2: Paint heart box with color(s) of your choice, allow to dry.
Cut heart shape slightly smaller than box lid from each piece of decorative paper. Feel free to be creative with shapes and papers / embellishments if you prefer a different look.
Brush a thin layer of glue on the back of paper shapes. Position first shape on box lid. Use your fingers to smooth out the paper and ensure that there are no air bubbles between the paper and lid. Repeat as necessary with additional cut shapes. Allow to dry.
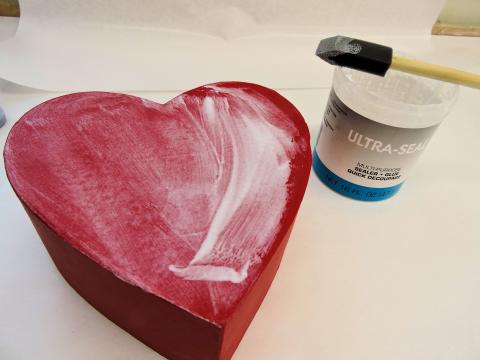
Step 3: Seal entire box, inside and out, by brushing three thin coats of Ultra-Seal or white craft glue on all surfaces allowing each coat to dry before going on to the next. Allow last coat to dry overnight.
Step 4: Elevate box lid (top facing up) and box bottom (bottom facing up) above work surface using plastic cups.
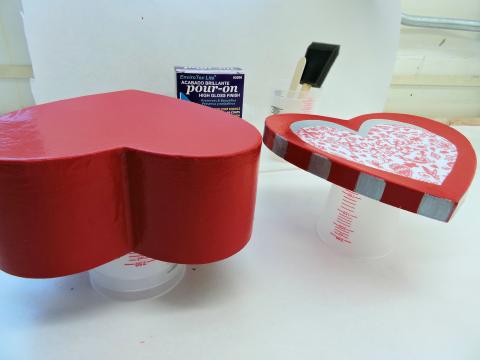
Step 5: Measure and mix 10 ounces of the EnviroTex Lite® according to package instructions. Pour ¼ to ½ of mixture on the box top and the remainder on the box bottom.
Use disposable foam brush to help product flow over the top and edges of both box pieces. Brush out drips or sags that appear on vertical edges.
After 15 minutes, if necessary, remove bubbles from coating per the EnviroTex Lite® instructions. Allow to cure for 72 hours.
Step 6: Gently sand any cured drips on the edges of lid and box bottom. Use proper protection while sanding.
Step 7: Place box bottom on cardboard, trace around outer edge. Cut out traced shape with scissors. This will become the divider inserted between layers of candy inside the box.
Cover divider with wax paper, secure with clear tape.
Create Candy Molds and Candy
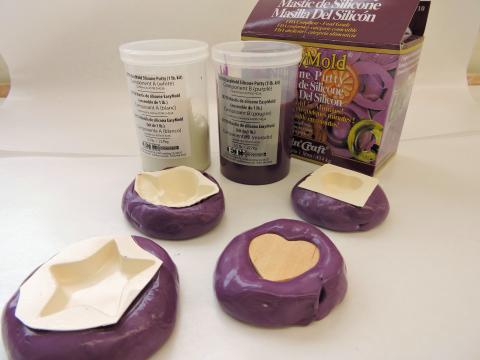
Step 1: Mix EasyMold Silicone putty according to kit instructions. Roll mixed putty into a ball and flatten slightly. Press chosen trinket or shape into putty to form mold. Repeat as needed for remaining pieces. Allow mold(s) to cure for 25 minutes, then remove original(s). Allow to sit overnight before using.
Step 2: Wash molds in warm soapy water and dry completely; then place your molds on a cookie sheet lined with wax paper.
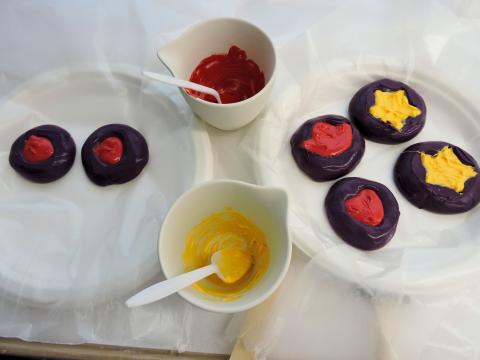
Step 3: Melt chocolate according to package instructions.
Step 4: Spoon melted chocolate into silicone molds. Place cookie sheet in the refrigerator until chocolate has cooled completely.
Step 5: Remove chocolate from molds and place in paper baking or candy cups. Line bottom of heart box with a single layer of filled cups. Place wax lined divider on top of first layer of candy. Add second layer of fill cups on top of divider.
Step 6: Place the lid on your candy box and deliver it!