Posted by Myléne Hillam on Nov 11th 2020
EasySculpt Decorator Keepsake Hearts
Materials List:
- EasySculpt®
- Polystyrene heart
- 2 - 10mm Fuchsia flat back Swarovski crystals
- Jacquard Piñata Alcohol ink: Passion Purple & Señorita Magenta
- Ranger Alcohol ink: Eggplant & Butterscotch
- G-S Hypo Cement
- Firm fitting latex gloves
- Clay blade
- Needle tool
- Teflon craft sheet
- Talcum powder
- Timer
Project Instructions:
Before beginning, put on your gloves – EasySculpt will be sticky while you are working with it. Re-powder your gloves as soon as the clay begins to stick to them. Lightly dust the Teflon craft sheet with powder.
Scoop out equal quantities about the size of large marbles of EasySculpt Parts A and B. Mix them together following the package instructions.
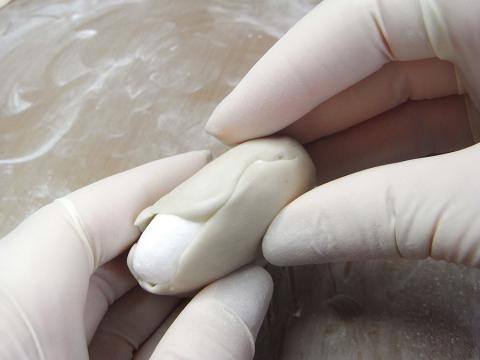
- Shape the EasySculpt into a circle and then place it on the top of the heart.
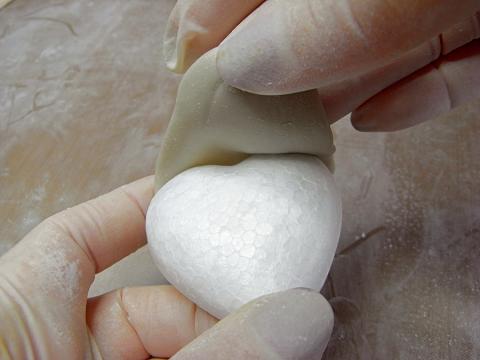
- Ease the clay around the heart. Gently stretch it to reach the bottom and trim away any excess. Smooth the seams out with your gloved fingers.
- Use a needle tool to pop any bubbles and smooth the hole out. Smooth out the clay evenly over the heart and set it aside on its back to firm up. Periodically check it during the next 2 hours and smooth out any wrinkles and flat spots, which form.
Measure out pea-size quantities of Parts A and B and mix them together. Divide into two balls and flatten them into rough circles. On one, squeeze two drops of Eggplant ink and allow it to sit for a minute for the alcohol to evaporate before mixing it in thoroughly. Re-powder you gloves, flatten it again and add two more drops of alcohol ink. Mix it in as before. Keep re-powdering your gloves as necessary. Once the shade is quite dark, add two drops of Passion Purple alcohol ink and mix it in. Set aside on the Teflon sheet to firm up. Color the other ball with two drops of Señorita Magenta alcohol ink and mix it in. Set the colored EasySculpt aside and set the timer for 25 minutes.

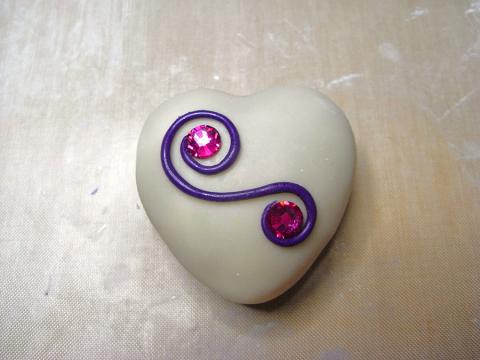
- Glue the two crystals on the front of the heart, one in the peak of the heart and one on the opposite side near the bottom.
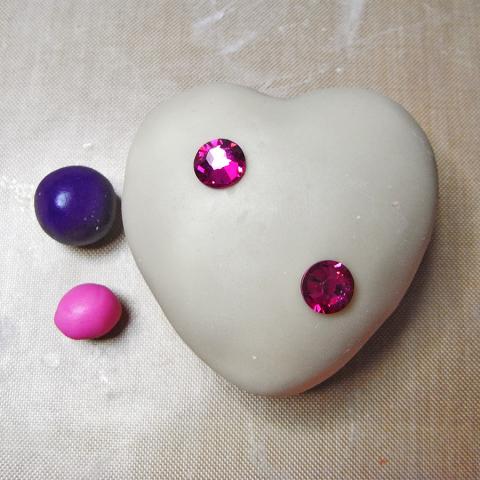
- Pinch a piece off the purple ball and roll it into a thin snake using the heel of your hand.
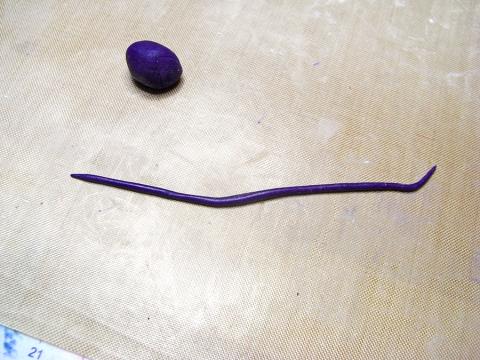
- Create an “S” shaped swirl with the snake, connecting the two crystals together.
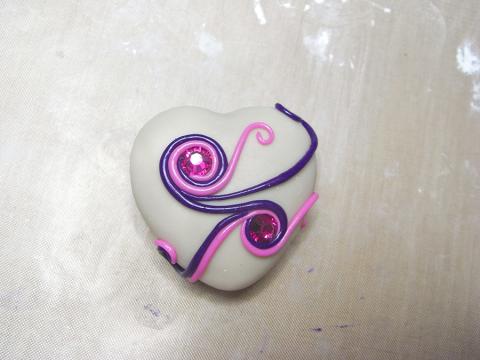
- Pinch a piece of pink clay and roll it into a snake. Tip: If the EasySculpt is too soft to work with, let it sit for another 10 minutes. If it is too dry to stick to the heart, use a small amount of G-S Hypo Cement to adhere it to the surface. Coil it around the top crystal and form it into an “S” across to the right hand side of the heart. Make another snake; coil it around the bottom crystal and form it into an “S” shape on the left hand side of the heart. Continue adding swirls until you have covered the front of the heart, allowing some of the swirls to roll over the back. Take care as you work not to flatten the swirls. Balance the heart on a small bottle cap so that the clay on the back is elevated off your work surface. Set aside to firm up for 2 hours.
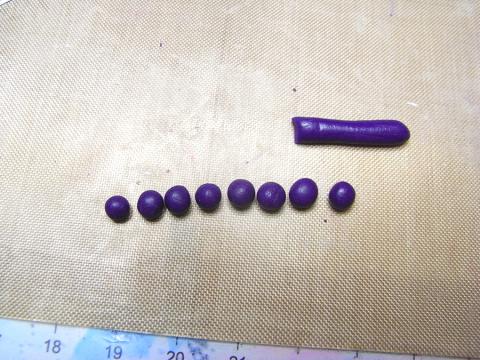
- Roll the leftover clay into a 3/16” wide log and slice it into 3/16” pieces.
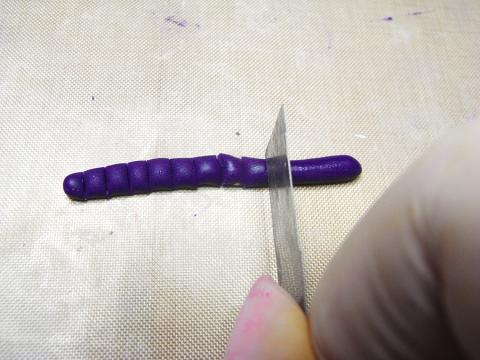
- Roll each of the pieces into a ball.
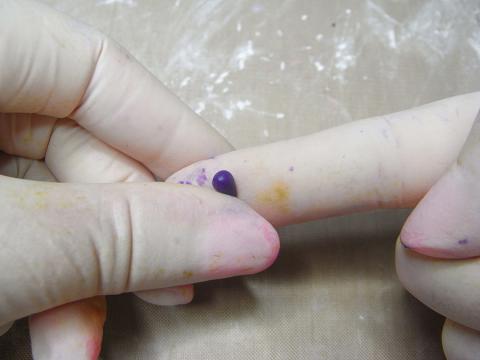
- Form each ball into a teardrop by rolling one side of it between your fingers to form a point.
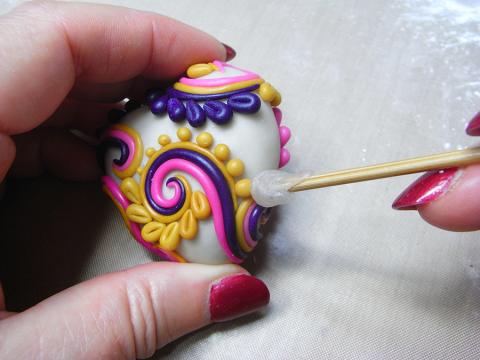
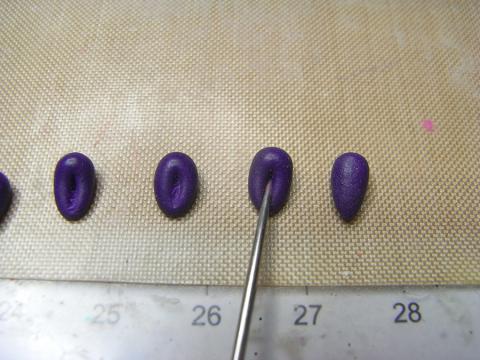
- Press the tip of the needle tool into the center of the teardrop. Form the rest of the log into balls of graduating sizes. Mix a small amount of clay and color it with Butterscotch ink. Set aside and set the timer for 30 minutes. Once firm, form into snakes and line the inside and outside the purple and pink swirls. With the left over clay, create more teardrops and graduated balls. Set aside to firm up for 2 hours.
- Use G-S Hypo Cement to attach the teardrops to some of the outer curves of the swirls, butting them up against each other at an angle.
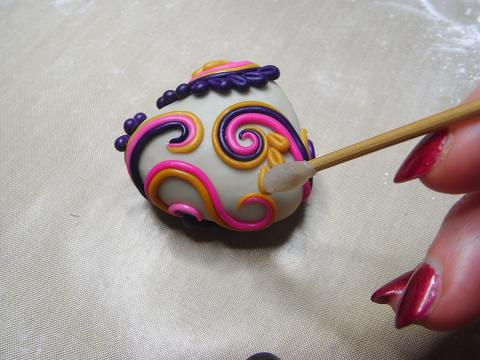
- Attach balls of graduated sizes along the inside and outside of other curves. Create swirls on the back of the heart in the same way.